Creamy Green Chili Chicken Enchiladas

I originally found the inspiration for this recipe from a low-fat cookbook I bought many, many years ago…pre-Chefpickykid times.  I liked the essence of the original recipe, but it was pretty bland.  Not a whole lot of flavor, and it used fat free cheddar cheese.

Warning: I’m about to head off on a tangent-just want you to be prepared.

My apologies to fat free cheese lovers, but I’m not a big fan of fat free cheese. I know we’re all trying to cut back on calories and fat, but let’s be honest, fat free cheese just doesn’t have a lot of flavor, and when it melts it is similar to the consistency of cement.  I probably shouldn’t be so hard on fat free cheese.  Many people like it and I’m sure it has its uses; it’s just not for me.

Sorry,  I got a little off track.  I guess I’m just passionate when it comes to cheese. I’m good with many other fat-free alternatives to food (many of them are used in this recipe and take nothing away from the overall flavor),  but I’m of the opinion that if I’m gonna use cheese, I’m gonna do it right.  I’m a big believer in the term “all things in moderation”.  Besides, I’ve found that if I use sharper or more flavorful cheeses, I can use less cheese; essentially I get more bang for my buck.

Back to the recipe….since I was a little disappointed in the original recipe, I’ve been working on a tastier alternative to this recipe for many years.  I think I’ve come up with a pretty good one, and even though it doesn’t use fat free cheese, it’s still a relatively healthy recipe.  I’m still experimenting with ways to make it a little spicier (keep in mind I’m a big fan of super duper spicy food), but I like this recipe; it’s tasty and easy to make.

Creamy Chicken Enchiladas

4 Boneless, skinless chicken breasts

1 Tablespoon olive oil

1 Small yellow onion, chopped

2 Cloves garlic, minced or finely chopped

1 16 Oz can green chile enchilada sauce

1 Cup shredded pepper jack cheese

1 Cup shredded cheddar

1 Can of Cream of Chicken Soup (I use the 98% fat free for this one…I don’t have a passion for soup. 🙂 )

1 Cup of sour cream (I also use light sour cream for this one)

1 Can of diced green chilies (7 oz can)

Salt and Pepper, to taste

Flour tortillas-this recipe should make 10-12 enchiladas depending on how fat you stuff them.  You can also use corn tortillas if you prefer.  See my recipe for Chipotle Chicken Enchiladas for tips on using corn tortillas.

Pre-Heat the oven to 375 degrees.

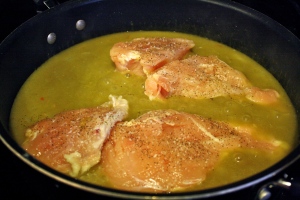
Heat a large skillet over medium-high heat.  When the oil is heated, add the onion and garlic and saute until the onion becomes translucent; about 5-7 minutes.  Add the enchilada sauce and bring to a boil.  Season the chicken with salt and pepper and add to the boiling sauce.  Cover the skillet and allow it to simmer until the chicken is cooked through-this should take about 20-25 minutes.

While the chicken is cooking, prepare the creamy enchilada sauce.  Mix together the sour cream, cream of chicken and diced green chilies  Set the sauce aside for now.

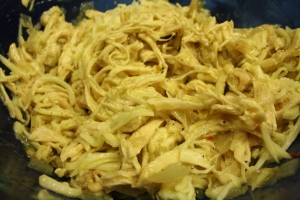
When the chicken is cooked through, remove it from the skillet and allow it to cool enough to handle.  Don’t throw away the sauce yet!  Once the chicken has cooled, shred it with two forks and place it in a large bowl.  Add the pepper jack cheese and half  the enchilada sauce and stir to combine.  Season with a little more salt and pepper, if you’d like.

Now it’s time to prepare the enchiladas! Spray a 9X13 baking dish with cooking spray.  Place a tortilla on a plate and fill it with about 2-3 tablespoons of the chicken mixture and roll up tightly.  I prefer to leave the ends open on my enchiladas, but you can also fold each end first, then roll up the tortilla to keep the ends closed. 
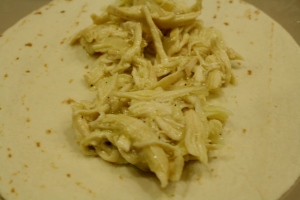
Place the enchiladas close together in the baking dish, and when they’re all packed in, top your enchiladas with the creamy green chili sauce you prepared.  Sprinkle the cheddar cheese on top of the enchiladas, cover and bake for 20 minutes.  Remove the foil and bake for another 10 minutes or until the cheese is melted and bubbly.  I didn’t do it this time, but I also like to sprinkle a little chopped green onion or cilantro on top before I bake to add a little extra flavor and color.

By the way, these also make great leftovers! I even like to eat them cold the next day!  Confession- I love cold leftovers, so I’ll eat just about any leftover food cold! 🙂

Cherry Smoked Pork Ribs and Food Fails

I debated about whether or not to post this recipe, because well…it didn’t really turn out the way I’d hoped.  My first inclination was not to post it, because who wants to read about a failed recipe?  But then I realized that the best way to improve is to learn from my mistakes.  And the best way to learn is by sharing my  mistakes with all of you.  🙂

I recently found a blog called Smoked N Grilled on Pinterest; it’s a site devoted to recipes for all things smoked and grilled (hence the name).  You should really check it out if you’re into grilling or smoking meats-there’s some fantastic recipes!  Anyway, as I was looking through the recipes, I got inspired.  I’ve always been a huge fan of Grillin’ and BBQ’in, but I’ve never really delved into smoking meats; mostly because I don’t have a smoker and I’m not sure I’d use one enough to warrant the cost of buying one.  But these recipes looked tasty, so I thought to myself… I can totally  do that!

So, I used the power of Google to find tips on using my gas grill as a smoker.  I’m sure all you hard core grillers out there will scoff at this idea, but I really wanted to try my hand at smoking meat, so I decided to give it a go.  And I have this great recipe for Cherry Cola Glazed Ribs, so I thought, HEY! I could try the Cherry Cola Ribs smoked on my makeshift smoker and smoke them with cherry wood!  Sounds like a fantastic idea, right?!   It was a fantastic idea!  But implementation…well…therein lies the fail.

Here’s a list of my Recipe Fail Lessons Learned:

Fail #1-I Googled  “How to smoke meat on a gas grill”, and in my meat smoking haste, I read the first one I came across. It seemed reasonable, so I didn’t  look around any further. Turns out it wasn’t the best resource after all-there weren’t enough details and the instructions were incorrect.  Lesson Learned: Take the Time…Do Your Research.

Fail #2-I I found a great recipe for smoked ribs from the before-mentioned website Smoked N Grilled and I used it as my guide for smoking my Cherry Cola Ribs.   The problem is,  I didn’t read the recipe completely.  I just skimmed through it. I neglected to notice that the ribs would take approximately 4 1/2 hours to complete-a fact I would have noticed had I reviewed the entire recipe.  I read “two hours” and stopped there.  Two hours is actually the point at which you first check on your smoking meat.  Apparently I thought I was some sort of expert because I learned everything there is to know about smoking meat from reading one reference from Google. (see Fail #1).  As a result I started this process entirely too late in the day.  Epic Fail.  Lesson Learned: Read the recipe, especially when you don’t know what you’re doing.

Fail #3-Because I started this process too late, I became impatient, so I ended up increasing the heat, which of course caused the meat to cook too fast.  The whole point of smoking meats is to cook it slooowwwlllyyyy (you’d think I would have caught on to that when I was reading the recipe…oh wait…I didn’t read the whole recipe…go figure).  As a result, the meat was not the fall-off-the-bone varietal I’ve come to know and love. Uber Fail.  Lesson Learned:  Patience is a virtue (as I often tell ChefPickyKid), and understanding the process is helpful too.

Fail #4-Now for this one, in my defense, I was sure I had one of these.  I always have one.  Who doesn’t have one?? Well apparently, I didn’t.  What is this magical item, you ask?? Wait for it…. a meat thermometer. The most important tool you’ll need for smoking meat besides the grill.   And I didn’t have one.  Are you kidding me??   And by the time I realized I didn’t have one, it was too late for me to get one.  And of course, being the One Google Resource Expert that I am, I decided I didn’t need one. Which of course led the meat to being overcooked.  Massive Fail.   Lesson Learned: Be sure you have the right tools for the job-before the job begins.

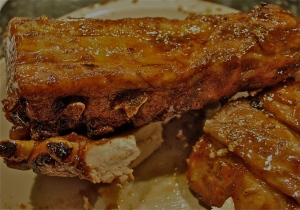
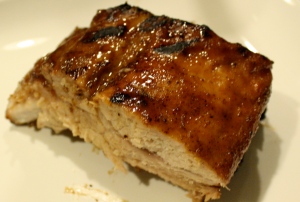
Now, all fails considered, the ribs really didn’t turn out all that bad.  The marinade/glaze was great, and the cherry wood smoked with the ribs left a wonderful flavor.  They just didn’t turn out the way I envisioned them to be; they were over cooked and a little tough.  But, I know that I have learned from my fails , and next time this recipe will be even better.


Cherry Smoked Pork Ribs

See my recipe for Cherry Cola Glazed Ribs for the ingredients for this recipe. For the smoked ribs I doubled the ingredients (not the meat, just everything else)  and divided it.  I marinated the ribs in the same ingredients as the glaze, and then created the glaze to finish the ribs.

Combine all the ingredients from the glaze recipe in a large glass pan or large bowl (don’t cook it over the stove as the recipe mentions; just mix the ingredients together-you’ll make the glaze later)  Marinate the ribs, refrigerated, overnight.

Remove the ribs from the marinade about 1/2 hour before you’re ready to begin cooking.  Pat the meat dry and rub it generously with your favorite meat rub.  I’ve made many homemade spice rub recipes, but for this one I used a pre-made Chicken and Pork Rub from a local company called Penzey’s Spices .  Leave the meat out of the refrigerator so it can come to room temperature (or close to it) before you begin smoking it.

I’m not going to describe how I smoked the meat on my gas grill (see Fail #1), but I did find another resource that has very helpful information on using your gas grill as a smoker.  I’m going to try this method next time.

How to Smoke Meat on a Gas Grill

I based my smoking time and method on a recipe I found on SmokedNGrilled.com.  This recipe is for Peach Smoked Ribs; I didn’t use the ingredients, just the smoking time and temperature (well, I should have, but I didn’t-See Fail 2) .  I used cherry wood chips for my recipe because I thought it would taste great with the Cherry Cola Glazed Ribs.

While my ribs smoked on the grill, I prepared the Cherry Cola Glaze according to the original recipe.  When the ribs were about 10 minutes from removing from the grill, I basted them with the Cherry Cola Glaze and served the remaining glaze on the side.


I’m not sure this was a recipe so much as it was a kitchen confession, but I hope that while you were laughing at me  with me, you learned a little something, or at least had a laugh over your own Food Fails.


Easy Peasy Pasta Salad

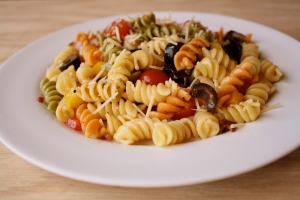
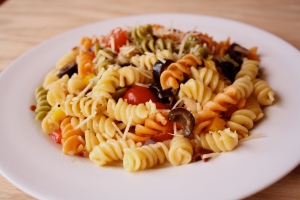
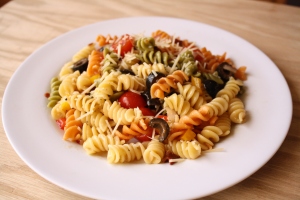
I’m looking through my blog posts and I realized that I haven’t posted my go-to pasta salad recipe!  This recipe has been a staple in my house for years…it’s a great summertime, BBQ, feed a bunch of people kind of recipe.  What I love most about this pasta salad is its versatility; you can pretty much make this recipe however you like.  I also love the colors in the salad, with the Rainbow Rotini and fresh vegetables…it reminds me of summer and good times with family and friends.  Oh, and did I mention it’s ridiculously easy to make (hence the title)?


This is actually my husband’s original recipe.  My husband is not a big fan of cooking…his meals usually consist of Kraft Mac and Cheese, although he has become quite the griller as of late (is griller even a word?? Meh, whatever!).  My Mother-in-Law used to make this recipe when my husband was a kid, and he made it for me a long, long time ago.  We’ve made a lot of variations of this recipe; we’ve omitted the olives and bacon and added jalapenos, cilantro and pepperjack cheese (thanks to my friend Chi Chi for that idea!), and we’ve also added extra vegetables like broccoli, cauliflower or cucumber.  You can add whatever you think sounds tasty!  The only requirement for this recipe (according to my husband) is that you MUST use Newman’s Own Italian Dressing. According to him, no other dressing tastes quite the same.  I haven’t tested his theory, but I trust him.  🙂

I make this recipe in large quantities because it makes great leftovers the next day.  If you don’t want to make bucket loads of pasta (okay, it’s not really bucket loads, but it does make a lot of pasta salad), just cut the recipe in half.


Here’s the recipe:

2 Packages of Rainbow Rotini pasta, cooked al dente according to package directions

1 Package of cherry or grape tomatoes, halved

1 Red bell pepper, chopped

1 Yellow bell pepper, chopped

1/2 Medium red onion, diced or finely chopped

5-6 Slices of bacon, cooked crispy and crumbled (you can also use bacon bits if you don’t have time to cook bacon, but I prefer the real deal)

1 Can sliced black olives

1 Bottle of Newman’s Own Italian Dressing

2 Tablespoons of Balsamic Vinegar (approximately-I just eyeball it)

1 Teaspoon garlic powder

1 Teaspoon seasoned salt

Salt and Pepper, to taste

1/2 Cup (about a handful) of parmesan cheese

There really aren’t a lot of instructions for this recipe; just throw everything into a bowl and mix it up!  I like to chill the pasta salad in the fridge for a few hours in order to serve cold, but it’s also good served room temperature or even warmed.  I sprinkle the parmesan cheese over the pasta salad right before serving.


Spicy Spanish Rice

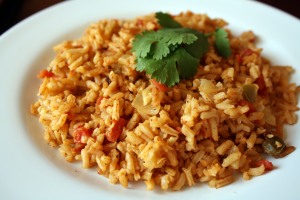
Okay, time for a confession…rice has not always been my strong suit when it comes to cooking.  For some reason, I’ve always had a tough time with rice.  I’m not talking about the steamed rice boiled in a pot; I can handle that.  I’m talking about Spanish Rice, Rice Pilaf, and similar varietals.  Ever since giving up Rice-A-Roni and attempting to make it on my own, I just haven’t been able to get it right.  It’s either under/over seasoned, too dry, too soggy, undercooked and crunchy, or a hot, mushy mess.  When I attempted to serve rice to friends and family I usually served it with a disclaimer of “well, I made rice, but don’t feel obligated to eat eat”.  Yikes.

Well, I’m happy to say that I’ve finally gotten it right.   I know, it isn’t  rocket science, but after many years, I

have figured out a way to make Spanish Rice that I don’t have to serve with a disclaimer.  And that makes me happy…

So, here’s my recipe for Spicy Spanish Rice.  It’s really quite simple, but it’s tasty.  I recently served it with

Crock Pot Chicken Tacos; it was a great side dish and made good leftovers too.

1 Cup of long grain rice-I prefer white rice for this dish.

2 Tablespoons of butter

1 Medium yellow onion, chopped

2 Cloves garlic, finely chopped or minced

1 Can Ro-Tel tomatoes-I used the “hot” Ro-Tel, and it was pretty spicy.  If you’re not into extra spicy food, you might want to choose the mild or medium

1 Cup water

1 Cup chicken stock

Salt and Pepper, to taste

Heat the butter in a large skillet over medium-high heat.  When the butter has melted, add the onion and garlic and saute until the onion starts to soften and turn translucent, this should take about 5 minutes.   Once the onion begins to soften, add the rice and cook it until it browns, stirring frequently.  Once the rice is browned, add the water, stock, and Ro-Tel and bring to a boil.  Season with salt and pepper to taste.  Cover the skillet tightly with a lid, reduce heat to low and simmer the rice for 20 minutes.

You can add lots of other stuff to the rice if you want to get creative.  I’ve added chili powder and cumin, cilantro, fresh tomatoes, or green onion, so experiment with ingredients and find what you like!

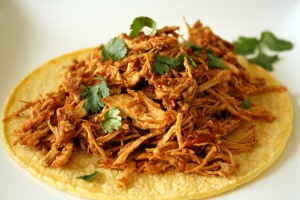
Another picture with the fancy camera…nice isn’t it?

Crock Pot Chicken Tacos

So before I begin to talk about this recipe, I have to share with all of you that I finally got the fancy camera I’ve been longing for!  You have no idea how excited I am!  Now I can finally start taking some respectable pictures of my recipes…now I just need to figure out how to work the fancy camera.  🙂  A big thank you to Mom and Dad for helping to make my dreams come true with an early birthday gift!

Anyway, on to the topic at hand.  Everyone loves crock pot recipes…what’s not to love?  Nothing is better than throwing a few items into a crock pot in the morning before you go to work, and knowing that you will have an effort-free meal waiting for you when you get home.  Crock pot recipes also seem to be one of the most popular recipes on my blog, and since Pinterest is loaded with tons of great recipes, I’ve been getting a lot of inspiration for new crock pot recipes.

I found this recipe on Pinterest (have I mentioned lately how much I love Pinterest?  It has literally changed my life!), and changed it up just a bit because I like to use my own spices, rather than taco seasoning.  It turned out super tasty and made great leftovers too!

Wanna see the picture I took with my fancy new camera?  I’m obviously still learning the ins and outs of the camera as well as general photography techniques, but it’s a heck of a lot better than my point and shoot digital.  Wow!  What a difference it makes!

What do you think?? Not too bad huh?

Anyway, enough about the camera and onto the recipe.  The best thing about this one is that you probably have all of the ingredients in your kitchen right now!  Here’s the recipe for Crock Pot Chicken Tacos:

Inspired by the recipe Crock Pot Chicken Tacos by Chocolate Therapy

6 Boneless, skinless chicken breasts

1 Tablespoon of olive oil

1 16 Oz jar of salsa, whatever kind you like

2 Tablespoons chili powder

1 Tablespoon cumin

1 Teaspoon garlic powder

1 Teaspoon onion powder

1/2 Teaspoon cayenne pepper

1/2 Teaspoon black pepper, plus extra for seasoning the chicken

Salt, to taste

Heat a large skillet  with one tablespoon of olive oil (about one turn of the pan)over medium-high heat until the pan is super hot and the oil is smoking.  While the skillet heats, season the chicken with salt and pepper.  When the pan is hot enough, add the chicken to the skillet and brown on both sides; this shouldn’t take more than 3 minutes per side.  You aren’t cooking the chicken through, just cooking enough to brown.  You don’t necessarily need to do this step if you’re short on time-you can just throw everything in the crock pot and be on your way, but I like to brown meat first when I’m making crock pot recipes; I find that the meat comes out more flavorful and tender (rather than mushy) when I brown it first.

Once the chicken is browned, place it in the crock pot and add the remaining ingredients.  Cook the chicken in the crock pot for 5-6 hours on low, or 3-4 hours on high.  Once you’re ready to serve the chicken, remove it from the crock pot and shred it with two forks; the meat will be very tender so it won’t require much effort.

You can serve these tacos with just about anything, and they’re great with either corn or flour tortillas.  When I made them, I served them with lettuce, tomato, cheese, green onion, cilantro, and sour cream.  I also served these with Spicy Spanish Rice.

I’m off to take more photos now…I think I’m going to have to make every recipe on my blog again so I can take new photos.  🙂

Enjoy!

Rigatoni with Sausage and Spicy Tomato Sauce

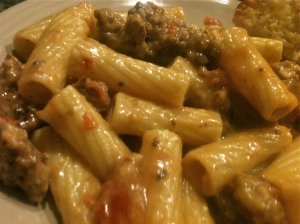
This recipe was an instant favorite in our house; it was incredibly easy to make and sooo good!

My husband and I are big fans of spicy food, so we really enjoyed this one.  It’s not eye-watering spicy, but just enough heat and flavor to add a little kick.  The original recipe for this dish included heavy cream. I wanted to lighten it up a little so I changed it up a bit, but I bet it would be super good with cream!! You could probably skip the milk as well if you want a more tomato-style sauce.

Here’s the recipe for Rigatoni with Sausage and Spicy Tomato Sauce:

Inspired by the recipe: Sausage with Rigatoni and Tomato Cream Sauce

1 Package of Rigatoni pasta, cooked to al dente

1 Tablespoon of olive oil

2 Tablespoons of butter

2 Tablespoons of flour

1 cup milk (I used 1%-that’s what I had in my fridge)

1 Pound of Italian Sausage, casings removed

1 Large yellow onion (or 2 small), thinly sliced

2 Medium garlic cloves, chopped

1 Cup chicken stock

1 Can of Ro-Tel tomatoes

1/2 Teaspoon of salt (or to taste)

1/2 Teaspoon black pepper (or to taste)

1 Teaspoon red pepper flakes (I may have used more like 1 1/2 teaspoons; add in 1/2 teaspoon at a time until you have the desired flavor.  I like spicy food, so I add more!)

1/2 Teaspoon cayenne pepper

1 Teaspoon chili powder

1 Teaspoon garlic powder or salt

Large handful of parmesan cheese, plus extra to sprinkle on top

Cook the pasta al dente, according to package directions.

Heat olive oil in a large skillet.  Once the olive oil is heated, add the butter and allow it to melt.  Add the onion and saute it until it begins to caramelize.  Remove the Italian Sausage from the casings and add it to the sauteed onion; break the sausage up with a wooden spoon as it cooks and brown it until it is completely cooked through.  Add the garlic and cook for about 2-3 more minutes, then drain the extra fat.

After you’ve drained the fat, add 2 tablespoons of flour to the sausage/onion mixture and cook for 1 minute.  Add the chicken stock and bring it to a boil, then allow it to boil for 2-3 minutes or until the broth has reduced.  I reduced it by about half so the pasta would be thicker.  Add the Ro-tel tomatoes and bring to a boil, then reduce the heat to a simmer and allow it to simmer for about 5 minutes.  Add the milk, then bring back to a boil.  Once the sauce has begun to boil again, reduce back down to a simmer and allow it to simmer for 5 minutes more.  Add the red pepper flakes, cayenne pepper, chili powder, garlic salt or powder, and salt and pepper and stir to combine the ingredients.  I allowed the sauce to simmer for about another 10 minutes, but you don’t have to do this step if you don’t want to or are short on time.

Add the cooked pasta to the sauce and stir to combine.  Add a large handful of parmesan cheese to the pasta and combine.  I also sprinkled a little extra parmesan cheese on top before serving.

I served this pasta with homemade garlic bread with parmesan cheese; the bread was great for dipping in the sauce.  So yummy!!!!

Spicy Chicken Tortilla Roll Ups

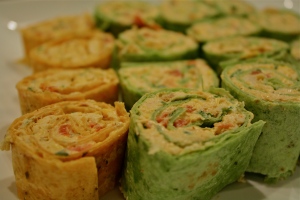
Let me just start by saying, these things are A-MAZING!  One of the tastiest appetizers I’ve had since discovering Buffalo Chicken Dip!  I made this for two holiday gatherings this week, everyone loved them and they were gone in a flash!

Here’s a link to the original recipe I found on Pinterest: Spicy Chicken Tortilla Roll-Ups.  These were super easy to make and I pretty much followed the recipe exactly.  When I made it a second time, I decided to add corn (the picture of this recipe is from the first time I made them and doesn’t have corn).  I’m thinking about adding black beans to the recipe the next time I make it (black beans might be a great substitute for chicken if you’d like to make a meat-free version).  Pepper Jack cheese might also be a great addition as well…this is such a simple and versatile recipe that I think there’s tons of variations possible.  No matter what, it’s fantastic and I will be making this recipe again and again!!

Here’s the recipe for Spicy Chicken Tortilla Roll-Ups: 


1.5 pounds boneless, skinless chicken breast

1 can Ro-Tel diced tomatoes, drained

1 large container of softened cream cheese (13.5 oz size)-you could probably use light cream cheese if you’d like to lighten it up a bit; I don’t think you’d lose any flavor.

1 cup shredded sharp cheddar cheese

1 clove garlic, minced or grated

3 teaspoons chili powder, divided

2 teaspoon cumin

1/2 teaspoon cayenne pepper

1/2 teaspoon garlic salt

Salt, to taste

1/4 cup chopped cilantro, about a small handful

6 scallions, white and green parts, chopped

About 3/4 cup canned corn, drained.  I used about 3/4 of the can of corn

6-8 large flour tortillas-I used spinach tortillas and jalapeno cheddar tortillas;  I think the jalapeno cheddar tasted best but having the different colored tortillas looked nice for presentation.  I would recommend using flavored tortillas if you can; I think plain tortillas would take away from the flavor and presentation.

Season the chicken breasts with salt, one teaspoon of cumin, and one teaspoon of chili powder.  Place the chicken in a skillet and add one cup of water.  Cover and cook on medium-high heat until cooked through; this took about 15-20 minutes.  Keep an eye on the chicken while it cooks; if the water cooksout of the pan you may need to add a little extra.

Once the chicken is cooked, remove it from the pan.  Allow the meat to cool until it is cool enough to handle, and shred it with two forks.

In a large mixing bowl, combine the cream cheese, drained Ro-Tel tomatoes, cheese, 2 teaspoons of chili powder, one teaspoon of cumin, garlic salt, cayenne pepper, garlic, cilantro, onion and corn and combine until mixed well.  Add the chicken to the cheese mixture and stir to combine.

Spread the filling out evenly among the center of the tortillas.  Be sure to spread a thin layer and leave the edges clean. Roll the tortillas up tightly, but do not fold the ends of the tortilla as you would when preparing a burrito, just leave the ends free.   Using a sharp knife, slice the tortillas into one inch slices and transfer to a serving platter.  You won’t be able to use the ends of the tortilla, so the best part is that you’ll have to just eat them!

If you are making these ahead of time, you can refrigerate the filling until you are ready to prepare the roll ups.  I wouldn’t prepare the roll ups the night before as this could make the tortillas dry or soften.  I made the filling the night before, and the roll ups an hour or so before serving.


Buffalo Chicken Grilled Cheese Sandwich

“Buffalo Style” seems to be a hot trend for recipes lately!  I’m finding a lot of recipes that make just about everything you can imagine Buffalo Style…casseroles, enchiladas, dip, sandwiches, you name it!  Which is okay with me because anything made Buffalo Style is sure to be a hit!!

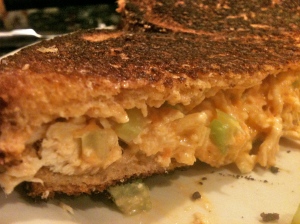
I found the recipe for Buffalo Chicken Grilled Cheese Sandwiches on Pinterest, and prepared it pretty much according to the recipe with just a few slight changes.  This sandwich turned out AWESOME!!   This is a great week-night recipe; it’s quick, easy to make, and oh so tasty!!

When I make Buffalo Chicken Dip, I use mozzarella cheese.  I think the next time I make this sandwich I’ll add mozzarella in addition to the cheddar cheese.

Here’s the recipe for Buffalo Chicken Grilled Cheese Sandwiches; this recipe made four large sandwiches.

Shredded chicken-I used 3 medium sized chicken breasts.

2 tablespoons Buffalo Wing Sauce-I like Texas Pete’s Buffalo Wing Sauce.  I use this instead of regular hot sauce because it’s a little thicker, but if you don’t have anything on hand regular hot sauce will work as well.

1/2 tablespoon blue cheese dressing

1/2 carrot, peeled and shredded

1/2 stalk of celery, finely chopped

1 tablespoon finely chopped red onion; I didn’t measure this out, but I used about a handful.

Approximately 1/2 cup shredded sharp cheddar cheese, room temperature.  I may have used a little more than 1/2 cup total; just be sure you have enough to sprinkle cheese evenly on each sandwich.

8 peices of bread-I used sourdough, but any kind of bread you like will work.

1-2 tablespoons of butter, room temperature.

Cook the chicken completely; I just poached the chicken in boiling water for about 10 minutes or until it was cooked through.  Once it’s cool enough to handle (but not cold, you’ll want the chicken to be warm for the sandwiches), shred the chicken with 2 forks.

Mix together the shredded chicken, buffalo wing sauce, blue cheese dressing, carrots, celery and onion.

Butter one side of each slice of bread.  Place the chicken mix on one slice of bread (the side without the butter) and sprinkle cheese evenly on top of the chicken mixture (you really can’t go wrong with cheese, so put as much as you like. 🙂 )   Top with another slice of bread (butter on top), and grill in a heated skillet for 3-4 minutes on each side, or until the bread is grilled and toasty and the cheese has melted.

Enjoy!!!

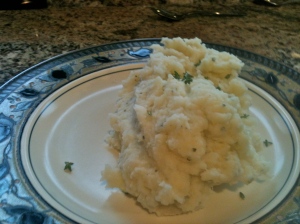
Creamy Garlic Mashed Potatoes with Rosemary and Thyme

I know, I know…it’s been awhile.  People have been asking me if I’m still working on my blog because it’s been so long since I posted a recipe.  Which is a real compliment in my opinion, because it means people are actually reading it!  So, I’m sorry I’ve been off my game as of late; it’s been a busy month.  But the good news is, I have a BUNCH of stuff to post!

This year we went back to our hometown of Sacramento to spend Thanksgiving.  It was nice spending time with family and friends we haven’t seen in awhile.  It was also nice to experience Fall again.  You see, here in the desert of Arizona, we don’t get much in the way of Fall weather.  Don’t get me wrong, I love the fact that it’s 75 degrees in December; I’ve grown very accustomed to the beautiful Phoenix weather (well, most of it.  Summer is a different story).  But it was nice to see all the leaves changing color, and  to feel the cold  brisk fall air again.

Thanksgiving dinner was at my mother-in-law’s house, and it was definitely a feast!! Lots of good food, and of course, great company.  My mother in law and I found a recipe for mashed potatoes that we thought we would try out for Thanksgiving dinner.  We bought all the ingredients, then I realized as I was getting ready to prepare them on Thanksgiving day that the recipe was actually for au gratin potatoes-oops!! But not to worry, I improvised and came up with a pretty tasty mashed potato recipe!!

These mashed potatoes have horseradish in them…that’s right, horseradish.  I originally wanted to include that ingredient in the title, but I was afraid no one would try it!  I know horseradish can be scary, but trust me, it’s just a small amount and adds a lot of flavor!  I will also warn you that this probably isn’t the healthiest recipe, but you could substitute butter with chicken stock or extra milk/buttermilk.

This is a large recipe for a big party, so if you’re only making it for 2-4, you might want to halve the recipe, unless you want a lot of leftovers (and you just might!) Here’s what you’ll need for the mashed potatoes:

1 5 lb bag  potatoes.  We used russett potatoes because we had giant amounts of them for Thanksgiving, but I think these would be really good with Yukon Gold Potatoes.  That’s how I’m going to make them next time.

2 shallots, minced

2 cloves garlic, minced (I think I might actually use 3 next time, but I like garlic)

8 tablespoons butter, plus 1 extra tablespoon to saute

1 cup buttermilk

2-3 tablespoons horseradish (start with 2, see how you like it, then add more if necessary)

1/2 cup sour cream

1/2 cup parmesan cheese

2 tablespoons fresh rosemary

2 tablespoons fresh thyme

Salt and pepper, to taste

Clean, peel and quarter the potatoes and boil in a large pot of water until the potatoes are fork tender. Add salt to the boiling water for extra flavor, if you’d like. Drain the potatoes and transfer to a large bowl or return to the boiling pot and keep the potatoes over the stove on low heat if you aren’t serving right away and want to keep them warm.

While the potatoes are boiling, melt one tablespoon of butter in a skillet over medium-high heat.  Add the shallots and garlic and saute until the onion is soft and translucent and the garlic is fragrant.  Set aside.

Add the buttermilk, butter, sour cream, shallot/garlic mix and horseradish to the potatoes and mash all ingredients together using a potato masher.  I would suggest adding the liquid ingredients a little at a time as you mash the potatoes;  we thought the consistency was just right, but  people have different tastes when it comes to consistency so better to start with less and add more.  Once you’ve finished mashing the ingredients together, add the rosemary and thyme and stir into the potatoes with a large spoon.  Add salt and pepper to taste and lastly, add the parmesan cheese and stir into the potatoes until the cheese is melted.


Happy Thanksgiving!!!

Stay tuned for another Thanksgiving recipe!!

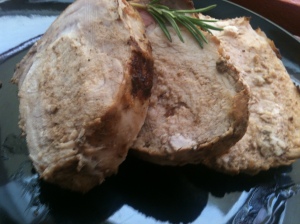
Roasted Pork Tenderloin with White Wine, Lemon and Rosemary

I wanted to make a roasted pork tenderloin this weekend.  I wasn’t sure what I wanted to roast it with, so I sort of improvised and came up with a really tasty marinade for the tenderloin.  We have a lemon tree in our back yard that is starting to produce fruit, so I wanted to use lemon, and for me, lemon always goes great with fresh rosemary. I would have liked to make a pan sauce with the marinade, but I didn’t have all the ingredients and was too lazy too busy to go to the store, but it still tasted fantastic without the sauce.   This pork tenderloin would also go really well with Roasted Red Potatoes with Rosemary and Garlic.

Everyone enjoyed the pork tenderloin..well, almost everyone.  Chef PickyKid didn’t enjoy it, but her friend did!  What can I say, she’s picky! 🙂

Here’s the recipe for Roasted Pork Tenderloin with White Wine, Lemon and Rosemary

1 Pork tenderloin

1/2 cup olive oil, plus about 2 tablespoons for searing the tenderloin and a little olive oil to rub on the pork tenderloin

1/3 cup soy sauce

1/4 tablespoons red wine vinegar

1/2 cup white wine

Juice of one lemon

1 clove of garlic, minced

1 teaspoon onion powder

Fresh rosemary, about 2-3 sprigs

kosher salt and black pepper

Whisk together the olive oil, soy sauce, red wine vinegar, white wine, lemon,  garlic and onion powder.  Rub a little olive oil on both sides of the tenderloin and season with kosher salt and pepper.  Place the tenderloin in a large freezer bag with the marinade.  Remove the rosemary from 2-3 sprigs of rosemary and add them to the bag.  I just hold the rosemary sprig at the top and peel the rosemary from the stem with my fingers.  Marinate the pork for at least 3-4 hours in the refrigerator.    If you have time, it’s even better if you marinate overnight.

Remove the tenderloin from the refrigerator about  a half hour before you’re ready to cook so it isn’t cold when you sear it.

Pre-heat the oven to 350 degrees.

Heat about 2 tablespoons of olive oil in a large skillet over medium-high heat until it’s hot.  I like to see a little smoke from the oil so I know it’s really hot; this is the best way to sear the meat.  Add the tenderloin to the hot skillet.  Sear the tenderloin until it is browned on both sides.  This will take about 10 minutes (five on each side).

Transfer the tenderloin to a roasting pan and roast until the internal temperature is 160 degrees.  The time for this may vary depending on your oven, mine took about 30 minutes.